Starting with WAMP, it allows developers to setup site in their local machine just like we setup on dev or production server. I've installed WAMP in my "C:\" drive. After installing WAMP, we get a directory called "C:\wamp\www" which we can directly access using "http://localhost" and any files and directory inside it by appending that to localhost. Suppose I've example as a directory in my "C:\wamp\www" directory so I can access it using my web-browser directly with "http://localhost/example".
What if I don't want to use localhost/example every time I'm accessing example directory, instead I would like to access it using http://example.local.com. Here comes the virtual hosts (vhosts) in Apache2.
Following are the steps to create vhosts in WAMP:
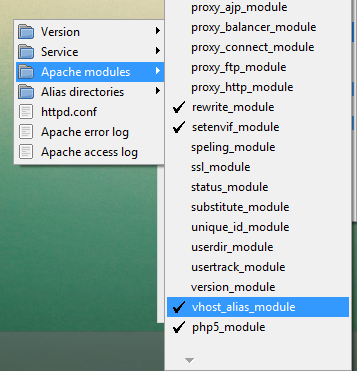
- For vhosts to work, we'll need to make sure that we've virtual host module enabled. To enable it left click on WAMP icon in system tray => Apache => Apache Modules => vhost_alias_module.

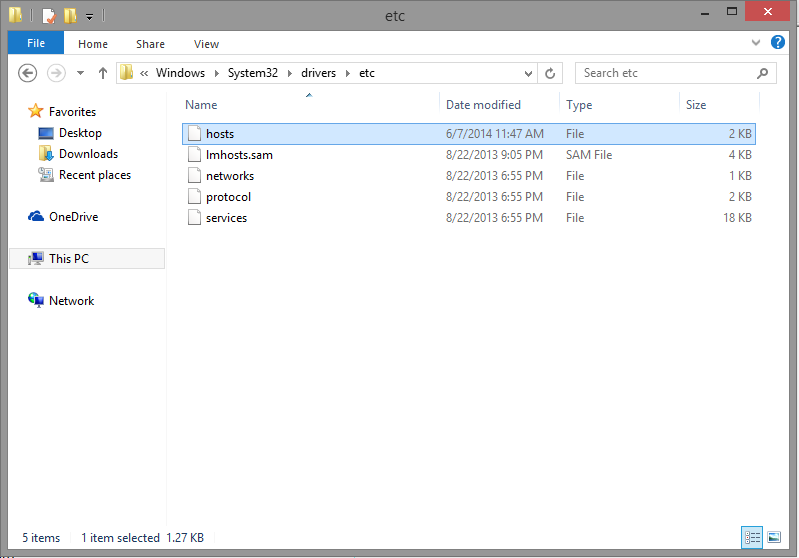
- Once we've vhost module enable we're good to start with. Now open hosts file located at "C:\windows\System32\drivers\etc\".

- Add following line to it and save.
127.0.0.1 localhostNote: If you're not allowed to edit the file, no worries, you can still copy that file paste into Desktop, modify it and copy updated file to "C:\windows\System32\drivers\etc\".
127.0.0.1 example.local.com
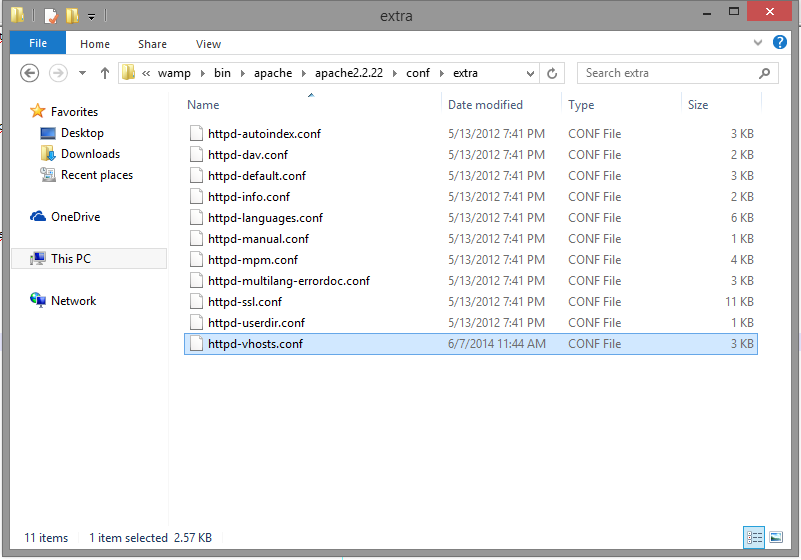
- After this, we'll need to tell Apache where to look for when "example.local.com" URL is hit. To do this we'll add following entries to httpd-vhosts.conf file inside "C:\wamp\bin\apache\APACHEVERSION\conf\extra\" directory.

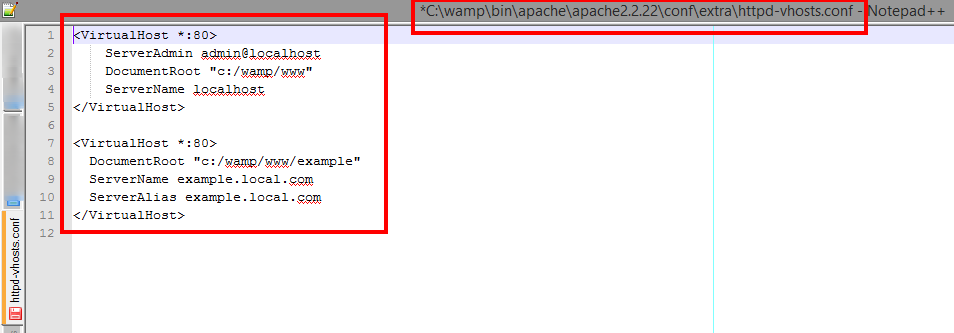
- Here is what you need to add in httpd-vhosts.conf file:
# for localhost to work properly
<VirtualHost *:80>
ServerAdmin admin@localhost
DocumentRoot "c:/wamp/www"
ServerName localhost
</VirtualHost>
# for example directory
<VirtualHost *:80>
DocumentRoot "c:/wamp/www/example"
ServerName example.local.com
</VirtualHost>
- Now Restart your wamp server.
- That's it, and we're done. Now go to your browser and access the http://example.local.com directly
